Abusing GitLab Runners
July 11, 2020
As technologists, both professional and hobbyist, we are spoiled for options for the technologies we deploy and use. One such area is that of Continuous Integration and Continuous Delivery (CI/CD). While evaluating options for a small project at home I started looking into GitLab Runners to compliment my existing private GitLab instance. In this article I’d like to explain what Runners are, roughly how they work, and how you can abuse them on your next penetration test or red team engagement.
While not an 'exploit' per se, I did want to demonstrate how you can leverage runner tokens if you find them as I had not seen anyone demonstrate this previously online. Hopefully I've saved you some time.
Setting up a GitLab Runner
Let’s say you have a simple project in Go and as a part of your CI/CD pipeline you’d like to ensure your project can be compiled.
To do this, you’d need to configure a GitLab runner. This can be done a number of different ways, but for the purposes of this article, you can create a GitLab runner through the following means:
Step 1: Create a VM and install gitlab-runner.
Step 2: Navigate to the settings of your repository and then navigate to CI/CD.
Step 3: Under ‘Runners’ scroll until you see your Runner Registration Token.
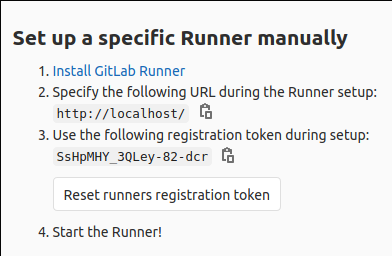
This token will be used to (surprise) register a runner with GitLab.
Step 4: Use this token along with the gitlab-runner tool to register the runner. This generates a separate runner token that is actually used with the API.
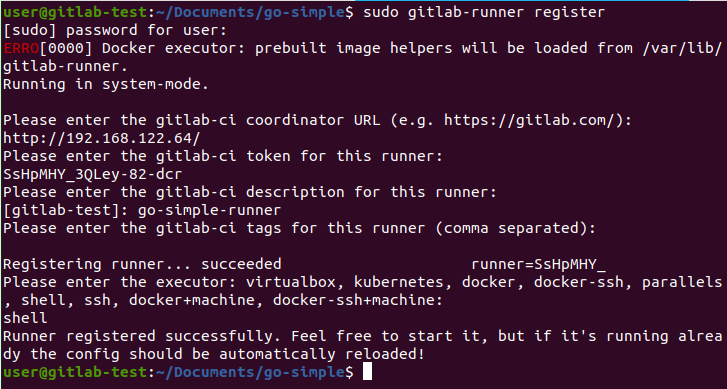
With that, you’ve configured a functional GitLab Runner. Next, you’d configure a simple .gitlab-ci.yml file like the one below (modified from the Go template in the documentation).
stages:
  - build

compile:
  stage: build
  script:
    - go build main.go
    - ./main
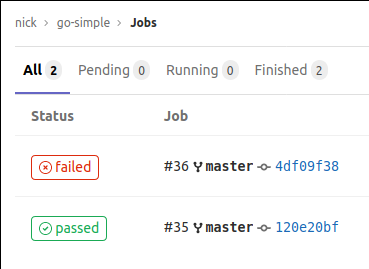
With this file defined, every push to the master branch will create a job and this job will be run by the runner. If it passes you get a lovely green badge, and if it fails it turns red.
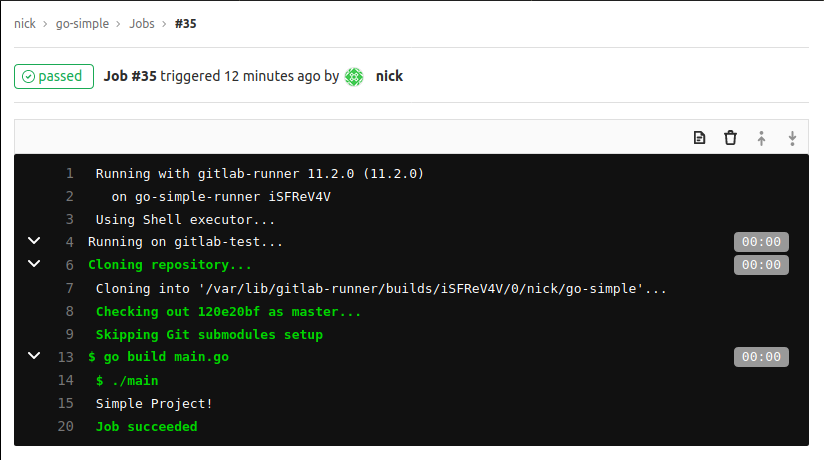
You can also view the output of these steps for each job like below.
Where Things Get Interesting
So far this just sounds like a simple way to do CI/CD and configure where the job is run. But let’s take it a step further and hone in on what we are interested in: How did the runner, configured on a separate system from GitLab itself, get access to the code and execute it?
Taking a look at the runner with something like Wireshark quickly reveals what is going on.
Approximately every 3 seconds the GitLab runner will send a post request to /api/v4/jobs/request. The vast majority of the time GitLab will respond with a 204 (No Content). However, after a push to a branch or tag that is configured for runners, it will respond with a 201 and send a blob of json with a boatload of data. This includes some juicy information including:
- Any project variables configured for CI/CD
- Information on who pushed the commit
- The name of the repository/project
- Temporary credentials to download code/containers from the repo
This is how the runner knows what to execute and how it gets the credentials to do so.
This provides us with a variety of options for attack scenarios if we can compromise either the registration token, or the actual token. In particular, access to the project variables may include important API keys we could leverage for more damage.
On the Offensive
Let’s say you are performing a penetration test for a client and stumble upon a note in their documentation providing you a GitLab runner registration token. You know literally nothing else about the project, nor would you have the ability to view it because it’s private.
A quick online search of the security implications won’t provide much info other than the official documentation which says “Runners use a token to identify to the GitLab Server. If you clone a runner then the cloned runner could be picking up the same jobs for that token. This is a possible attack vector to ‘steal’ runner jobs.”
In effect, if we have a valid runner registration token or runner token we can steal these jobs and all the information that comes with them. What this would consist of would be registering a new runner, spamming the endpoint looking for jobs, and then taking the data.
The advantage we have is that a normal runner will only query for jobs about every 3 seconds. We can query as many times as we want, thereby almost always ensuring we will win the race and get the data.
Demo
To demonstrate this I wrote a short Python script to perform the attack. In our hypothetical scenario where we have a runner registration token and the hostname of the GitLab server (but nothing else) we can start the attack by registering the token and getting a valid runner token as shown below.

This generates the token we will use to query for jobs. Next, we will use this token to query for jobs in a constant while loop. In doing so, we practically guarantee we will always get to GitLab before the legitimate runner. To do this we will run the following command.

Now that the trap is set, we will wait for someone to push to master. Obviously there are optimizations that can be made such as waiting until the start of the work day, or trying to predict when/if anautomated bot will do it.
When someone eventually pushes to master our script gets there first, takes the job, and steals all that information, dumping it to a file.

You might be wondering, “Nick did the job fail? What does it look like for the developer?”. There are a couple options for this. The first, if you want to fly under the radar, would be to allow the job to succeed. That way the dev is not emailed about the job failure. To support this, our tool will leave a friendly message.

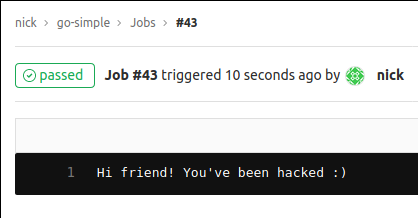
Alternatively you could remove the response from the tool. This would cause the job to eventually timeout and show as a fail for the CI/CD pipeline. The nice part about this is that there are no concerns about future jobs being harmed. So long as the script isn’t running, the next time a job is available the real runner(s) will pick it up.
There are a number of interesting things in the blob of json. If the repository is private we now have credentials to pull the code down. Note: This must be done before submitting the results of the job to GitLab. The script supports this with the --clone flag.
Next, take a look at any variables you have pulled down, including API keys.

And boom, from a random token you now have resources you wouldn’t have access to otherwise.
There are some other considerations you should take into account before doing this in a real world situation, such as what tags are configured for the runners. The script is capable of accepting tags, however I would encourage you to setup you own test environment first to ensure it will work the way you are expecting.